

Roast Automation
Rostoc can mark key roast events on the Curve for you, so you can watch the coffee instead of the screen. This page explains what Rostoc marks automatically, how detection works, and how to turn each part on or off.
Roast automation has two parts:
- Automatic Charge and Drop marking — Rostoc detects when beans enter or leave and places the corresponding mark on the Curve. Detection is temperature-based and works on any Machine with a live bean-temperature probe. Drop marking never stops the recording.
- Automatic event marking — Rostoc marks Dry End, First Crack, and Second Crack when the bean temperature reaches the targets from your Plan or your saved defaults. The two crack ends are always marked by hand.
Two things always stay in your hands:
- You start and stop the recording. Rostoc never starts or stops a Batch on its own.
- Automation never operates the Machine. It only places marks on the Curve. Sending commands to the Machine is a separate capability — see Machine controls.
Automatic charge and drop detection
Section titled “Automatic charge and drop detection”Charge
Section titled “Charge”With Auto Charge on, click Start as you normally would. Roast Studio stays in the between-batches (BBP) step and watches for the charge for up to 30 seconds. The moment Rostoc detects beans entering the drum, it marks Charge and the roast timer starts from that point.
While detection is active, Roast Studio shows a dismissible Charge detection in progress notice. It closes automatically when Charge is detected or the 30-second detection window expires. The AutoCharge indicator in the sidebar also shows where detection stands:
| Indicator | Meaning |
|---|---|
| Ready | Auto Charge is on and waiting for you to start recording. |
| Detecting / Waiting | Rostoc is watching for the charge. |
| Detected | Charge was marked automatically. |
| Missed | No charge was detected within 30 seconds. Mark Charge manually — the roast continues as usual. |
| Disabled | Auto Charge is off for this Machine. |
How Rostoc detects the charge depends on the Machine:
- Nucleus Link — the Machine reports the start of its own roast log, and Rostoc uses that as the Charge mark. No guessing involved.
- Any Machine with live bean temperature — charging cool beans into a hot roaster makes the bean temperature fall sharply. Rostoc reads that sudden dip as the charge. Detection works best when the bean probe shows a clear temperature drop at charge — typical for drum roasters. On air roasters the probe often shows little or no dip (especially on back-to-back roasts), so detection may simply not trigger; Charge then falls back to the recording start after the detection window, and the roast continues as usual.
You can always mark Charge yourself while detection is running — with the Charge button, the C key, or Force charge on the detection notice. A manual mark always wins: it is recorded immediately and detection stands down for that roast.
With Auto Charge off, starting the recording marks Charge immediately and the roast timer begins at once.
- Nucleus Link — the Machine sends its own roast-end marker, and Rostoc places the Drop mark from it automatically whenever a recording is running.
- Any Machine with live bean temperature — Rostoc detects the end-of-roast temperature break and places Drop at the beginning of that break. Recording continues until you press Stop. If no break is detected, mark Drop manually with the button or the D key.
Turn automatic Charge or Drop marking on
Section titled “Turn automatic Charge or Drop marking on”Auto Charge and Auto Drop are both off by default.
- Go to Settings → Roasting.
- Under Recording Automation, turn on Auto Charge, Auto Drop, or both.
This enables the selected automatic markers for every Machine. You can also control it per Machine: open that Machine’s settings, go to Machine Details, and set Recording automation to Inherit, Allow, or Disable. Allow turns automatic Charge and Drop marking on for that Machine even while the global setting is off; Disable turns it off for that Machine regardless of the global setting; Inherit follows the global choice.
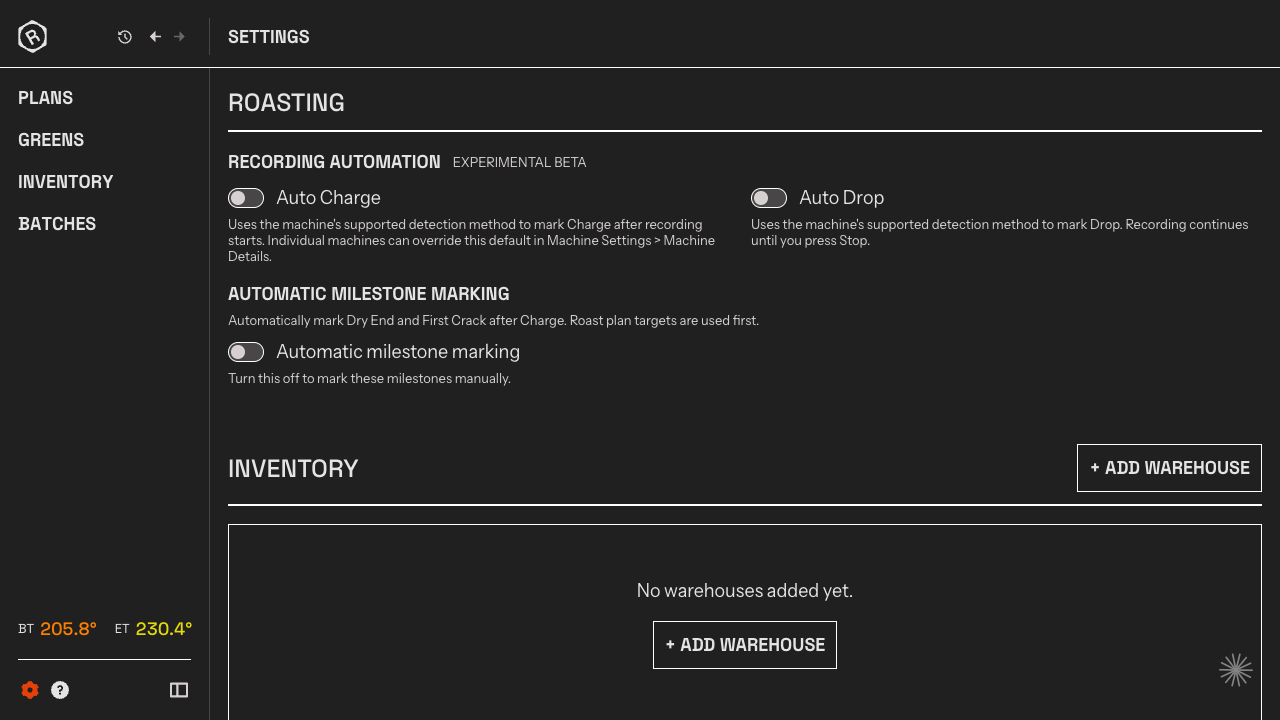
The Roasting section in Settings. Auto Charge, Auto Drop, and automatic event marking are controlled here.
Automatic event marking
Section titled “Automatic event marking”After Charge, Rostoc keeps watching the bean temperature and marks Dry End, First Crack, and Second Crack when it reaches the target temperature for each event.
Only the start of each phase can be marked this way. First Crack End and Second Crack End are always yours to mark: bean temperature climbs straight through the end of a crack, so no temperature can tell Rostoc when the cracking actually stopped.
Marking follows the roast rather than the clock. Each event only becomes eligible once the one before it has happened, so Second Crack is never marked before First Crack. And once you mark a crack as ended, Rostoc stops looking for that crack’s start for the rest of the Batch.
Where the targets come from, one event at a time:
- Your Plan. For each event, if the Plan’s reference Curve marked it, Rostoc uses that temperature.
- Your default temperatures. For any event the Plan does not cover, Rostoc uses the default saved in Settings → Roasting — unless you turn that fallback off.
Because most reference roasts never reach Second Crack, this is resolved per event: a Plan missing one target no longer sends the others back to your defaults.
Automatic event marking is off by default. In BBP, Roast Studio shows a simple Auto marking: Enabled or Disabled status with a colored dot. Its tooltip explains whether the targets come from the Plan or the saved defaults. Click the status to open Settings → Roasting.
Pending targets appear as thin gray horizontal lines. After Charge and turning point, the next line pulses when BT is within 3 °C below the target. The line disappears once the event is marked.
When Rostoc marks an event, a notice appears — for example “First Crack marked automatically” — with an Undo button. Undo removes the mark and keeps Rostoc from marking that event again for the rest of the Batch, so you can place it yourself.
Adjust or turn off automatic event marking
Section titled “Adjust or turn off automatic event marking”- Go to Settings → Roasting.
- Under Automatic Milestone Marking:
- Turn Automatic milestone marking off to mark every event manually.
- Turn Use default temperatures when plan targets are unavailable off if you only want marking when the Plan provides targets.
- Edit Dry End BT (°C), First Crack BT (°C), and Second Crack BT (°C) to change the fallback temperatures, then click Save default temperatures. Each must be higher than the one before it. Leave Second Crack empty if you never roast that far, and Rostoc will not mark it.
During the Batch
Section titled “During the Batch”Everything automation does is visible and reversible:
- Marks placed automatically look like any other event mark on the Curve.
- Each automatic mark announces itself with a notice and an Undo button.
- Changing the Plan, Machine, or settings updates the BBP status. Once recording starts, Rostoc keeps that Batch’s chosen targets unchanged.
- Every event button and keyboard shortcut keeps working. Automation never blocks manual marking — it fills in for you when it can, and steps aside when it can’t.