

Coffee Roaster Machine Controls in Rostoc
Machine controls let you send supported changes from Roast Studio directly to your roasting machine. Availability depends on the compatible Machine, connection, and the controls enabled in that Machine’s settings.
Machine controls require the Rostoc desktop app. They are not available at web.rostoc.co.
What Machine controls do
Section titled “What Machine controls do”It helps to separate four related parts of a roast:
| Capability | What it does |
|---|---|
| Telemetry | Reads live values, such as bean temperature or exhaust temperature, from the Machine. |
| Change markers | Records a gas, airflow, or drum speed change on the Curve without sending anything to the Machine. |
| Machine controls | Sends a value or action from Roast Studio to a compatible, connected Machine. |
| Automation | Would make changes without each command being entered by the operator. Rostoc does not currently automate Machine controls. |
A Machine can provide telemetry without supporting direct control. Control support depends on the exact model, connection, and control definition—not only the Machine brand or its telemetry support status.
Roast automation is separate from all of this: it marks events such as Charge and First Crack on the Curve. It never sends anything to the Machine.
Where controls appear
Section titled “Where controls appear”When your active Machine and connection support direct control, Roast Studio shows the available controls for that setup. Depending on the Machine, these can include:
- gas or heat
- airflow or fan
- drum speed
- temperature or other setpoints
- switches or Machine-specific actions
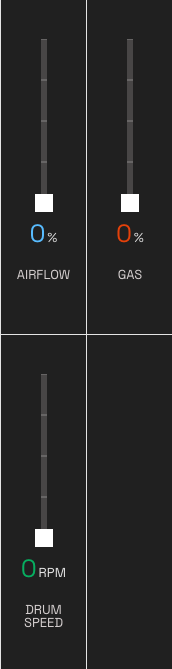
The control slider panel. Each slider fills from the bottom in the control’s own colour, with the current value and unit under the track. The selected Machine and connection determine which controls and value ranges are available.
Roast Studio shows these controls in two forms. By default they sit as compact knobs in the header, keeping the Curve in full view:
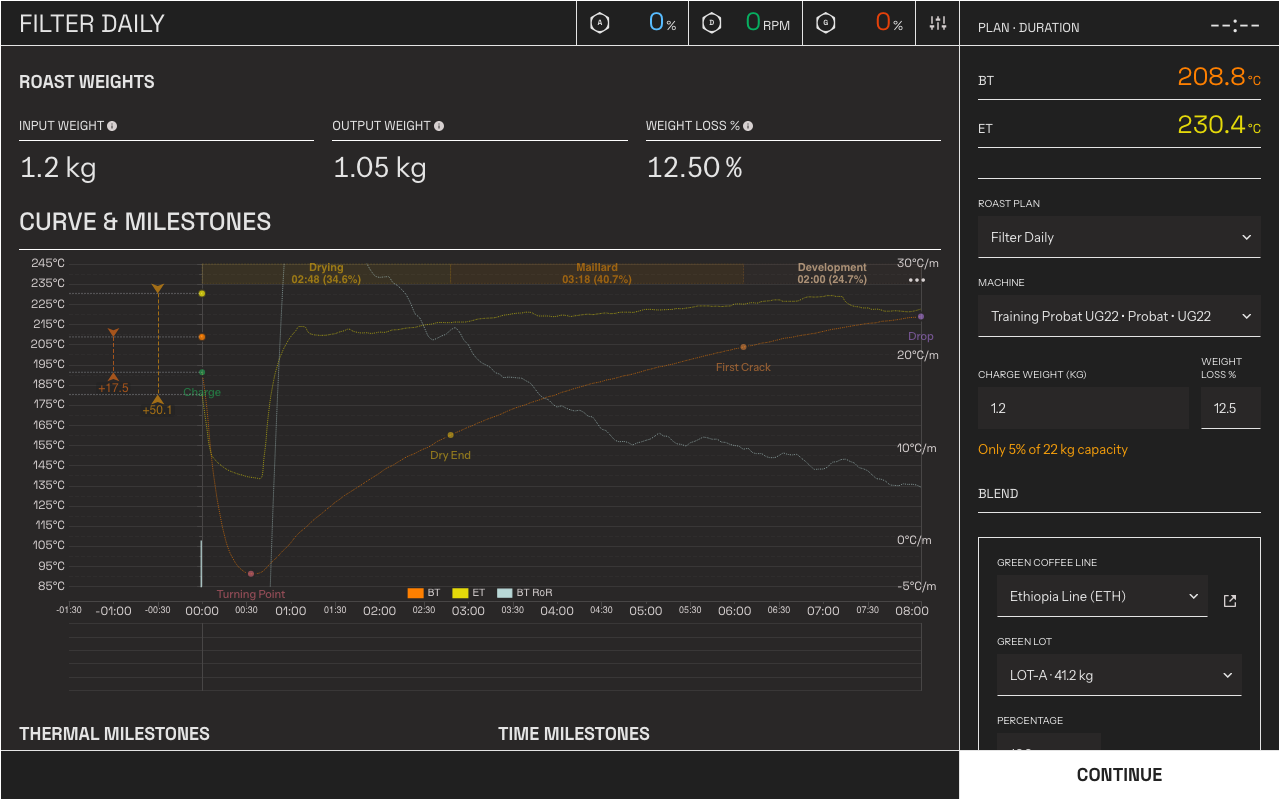
Compact controls: each knob shows the current value; open the panel for the full sliders.
Expand the controls panel to work with full-height sliders side by side. The panel keeps sliders in short columns, so five or six controls sit in three columns beside the Curve rather than one long row:
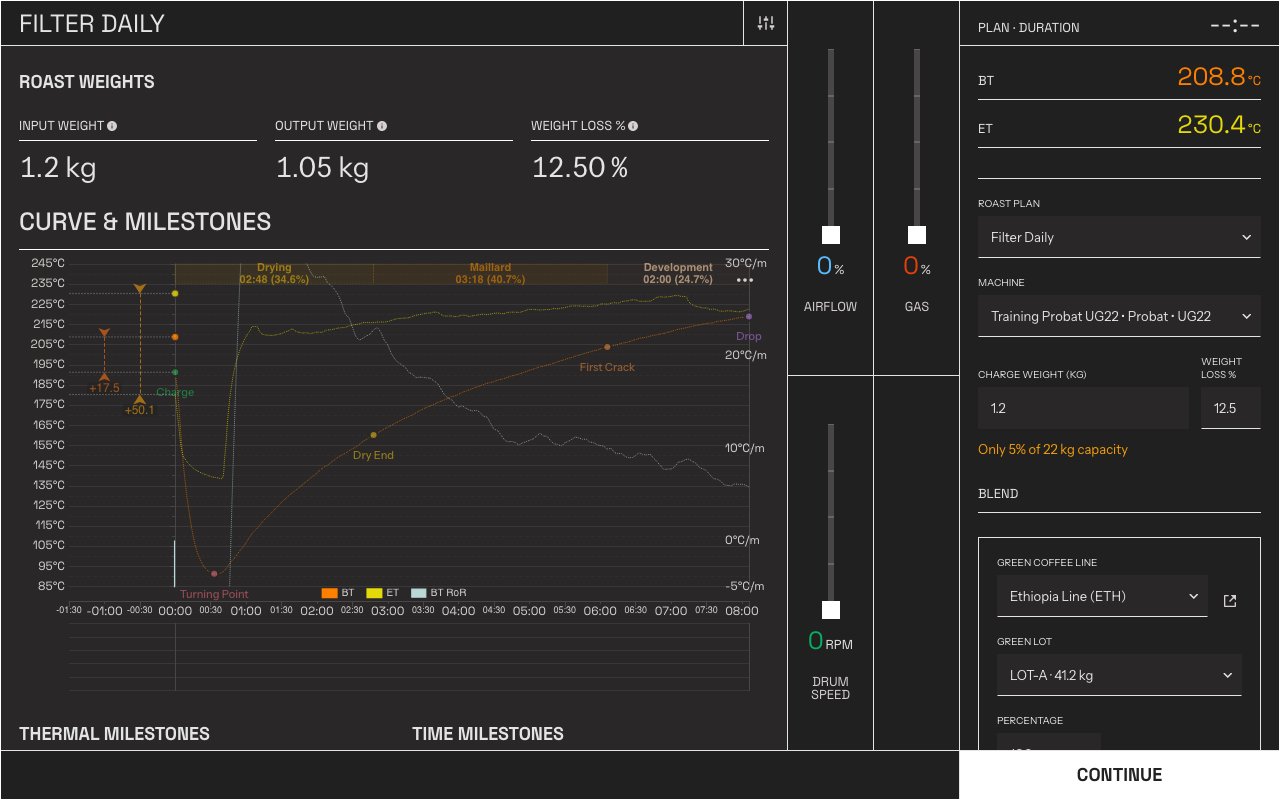
The expanded panel puts every control’s slider and value in one place.
A slider’s value follows your cursor. Point at or drag along the track and the value that spot would set appears next to the pointer; when you release, Rostoc sends exactly the value the readout showed. A compact header knob adjusts with a horizontal drag anywhere across it—the value follows the drag, and the command is sent once, when you release.
If controls do not appear, you can still record changes with Machine change markers in Roast Studio. Those markers document what happened during the Batch but do not operate the Machine.
Setpoint controls
Section titled “Setpoint controls”Some Machines are driven through a temperature setpoint rather than a direct output: you set the target, and the Machine’s own controller works to hold it. When a Machine’s imported settings file defines a setpoint slider, Rostoc gives you a real setpoint control in Roast Studio—the Sweet Coffee Italia Gemma is one example.
A setpoint reads differently from an output on the Curve:
- The Machine’s reported setpoint draws on the temperature chart as a stepped, dashed line. Like a thermostat, it holds its value until you change it—a step, never a slope—which sets it apart from the solid measurement curves.
- Setpoint changes do not add separate event markers to the Curve. The dashed line is the record, and your bean and exhaust temperatures show how the Machine followed it.
When a value is off the scale
Section titled “When a value is off the scale”A Machine can report a value outside a control’s configured range. Rostoc shows that honestly rather than pretending the value sits at one end of the scale:
- The slider hides its handle instead of parking it at a position the Machine never reported. The number under the track still shows the true reading, and dragging the track still works normally.
- On the Curve, an off-scale target is drawn at the edge of the chart with a
small triangle marker labelled with the control’s name and its true value—for
example
Limit: 600at the top edge. The line still shows when the target moved; hover the marker or the line for the exact numbers.
Enable and show controls
Section titled “Enable and show controls”Each control has two switches in its Machine’s settings, under Machines → Configure → Controls:
- Enable — a disabled control cannot write to the Machine.
- Show — a hidden control stays configured but does not appear in Roast Studio.
Enable all machine controls and Show all machine controls flip every control at once. These switches are necessary but not sufficient: each control also carries a review status, and only controls reviewed as executable for your exact Machine and connection can send commands at all.
When you accept updated settings for a Machine and they bring new controls, those controls arrive switched off. Your connection settings and your own choices stay exactly as they are, and nothing new can write to the Machine until you turn it on—the on-switch belongs to you.
Before you use direct control
Section titled “Before you use direct control”Confirm all of the following before sending a command:
- The exact model and connection support direct control. Check the Machine catalog.
- The correct Machine is active and connected on the Machines screen.
- The controls you need are switched to Enable and Show in that Machine’s Controls settings.
- No other computer application or remote control client is writing through the same Machine connection.
- You can reach the Machine’s physical controls and emergency stop immediately.
Treat Rostoc as one control surface in the roasting system. Keep watching the Machine and its own indicators throughout the Batch.
Send a control change
Section titled “Send a control change”- Open Roast Studio with the supported Machine active.
- Select the control you want to change.
- Enter or adjust the value within the range shown. A slider sends when you release it, and it sends the value its readout showed. A header knob sends when you release the drag, or one step at a time as you press the arrow keys. A numeric editor sends when you press Enter. Toggles and action buttons send when clicked.
- Watch the on-screen control and the physical Machine while the command is being sent.
- While Rostoc sends the command, the control is temporarily disabled. If Rostoc reports an error, stop and check the Machine. In every case, verify the Machine responds as expected.
Rostoc sends one Machine command at a time. A pending command temporarily prevents another write. If a command is rejected or fails, the on-screen control returns to its previous displayed position. This does not mean the physical Machine was rolled back; inspect the Machine and use its physical controls if needed.
You can also use the Machine control keyboard shortcuts to select a control, adjust a numeric value, and send it without leaving the keyboard.
Understand command results
Section titled “Understand command results”Rostoc tracks the following command states internally for diagnostics. A successful command does not currently have a persistent confirmation badge, so always verify the result on the Machine:
- Pending — Rostoc is sending the command.
- Acknowledged — the Machine connection accepted the write. This does not always prove the physical mechanism reached the requested position.
- Confirmed — available telemetry readback matched the requested value within the configured tolerance. This still does not prove that every physical mechanism moved as intended.
- Uncertain — Rostoc did not receive matching feedback within the expected time.
- Failed or rejected — Rostoc did not receive a successful result and shows an error. The on-screen control returns to its previous displayed position; this does not mean the Machine was physically rolled back.
Whatever the Machine does with a command, the change you made is recorded on the Curve once, at the moment you made it:
- If the Machine accepts a command but goes on reporting its old value, your change still appears on the Curve. The marker records what you did; the telemetry shows what the Machine actually did.
- For some controls, the only feedback available is the Machine repeating the command back. Rostoc records such a change once, from the command itself, and does not count the repeat as a second, separate change.
Not every Machine provides control feedback. When a control can only be acknowledged, confirm the result using the Machine’s own display, indicators, and physical response.
Built-in safety checks
Section titled “Built-in safety checks”Before a write reaches the Machine, Rostoc checks that:
- the control has been reviewed and approved for execution
- the control is enabled in the selected Machine’s device settings
- the command resolves against the selected Machine and its connected interface
- the requested value is within the control’s defined range
- the request is current and respects the control’s configured minimum interval, when one is defined
- another Machine command is not already being written
These checks reduce accidental or invalid commands. They do not replace your Machine manufacturer’s operating procedures or the judgement of the operator.
Operate safely
Section titled “Operate safely”- Keep the Machine’s physical controls and emergency stop clear and accessible.
- Do not use Rostoc and another control application at the same time.
- Watch the Machine after every command, especially when feedback is unavailable.
- If the Machine does not respond as expected, stop sending commands and use its physical controls.
- Test controls with a non-production setup before relying on them during a Batch.
- Follow the Machine manufacturer’s limits, maintenance guidance, and emergency procedures.
Machine controls are operator-directed. Rostoc does not automatically follow a Plan or Reference Curve and does not make control changes on its own.
If controls are unavailable
Section titled “If controls are unavailable”First confirm that the active Machine is connected. Then check its catalog page for direct-control support. A model listed as supported for live data may still be read-only.
If the Machine is disconnected or a command fails, use Connection troubleshooting. For access or compatibility questions, contact us with the Machine brand, model, connection type, and the control you want to use.