

Nucleus Link Setup
Rostoc supports Nucleus Link for live sample roast logging on supported setups. Use this guide when you want Nucleus Link roast data to stay connected to green coffee lots, inventory usage, roast plans, batches, and sample-roasting decisions.
What you need
Section titled “What you need”Confirm the physical setup first:
- Nucleus Link is powered on and ready to roast.
- The USB cable supports data, not only charging.
- The roaster is connected directly to the computer running Rostoc.
- Other roasting software is closed if it is using the same USB connection.
- You know which green lot or sample the roast should be attached to.
Nucleus Link support is setup-specific. If your device, firmware, operating system, or cable behaves differently, test the connection before relying on the record for daily sample roasting.
Add the machine
Section titled “Add the machine”- Open Settings -> Machines in Rostoc.
- Click Add Machine.
- Search for Nucleus in the catalog.
- Select the Nucleus Link entry and review the connection details.
- Connect the device over USB.
- Turn the machine on.
- Run the connection test (below) before relying on the setup for daily sample roasting.
Test the connection
Section titled “Test the connection”Click Test Connection, below the section list in the Machine settings window. The test opens in its own window and starts checking on its own — you don’t need to click through it.
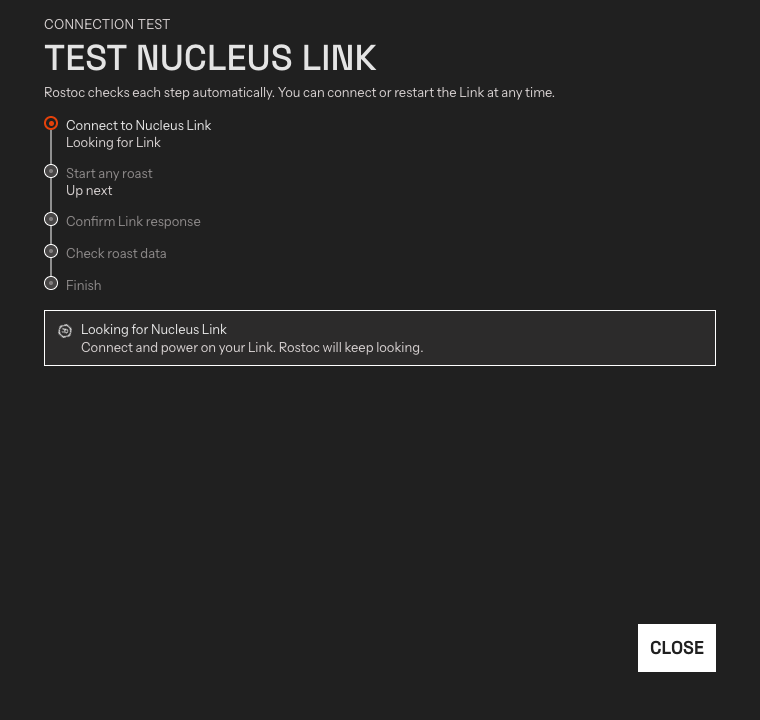
The guided test. Each step is checked off as Rostoc confirms it.
The window walks through five steps:
- Connect to Nucleus Link — Rostoc opens the USB connection. You can connect or restart the Link at any point; Rostoc keeps looking and retries on its own.
- Start any roast — the Link sends no data while it is idle, so start any roast on the device. You do not need to add beans or put on the glass top. A countdown shows how long Rostoc keeps listening (45 seconds). Stay with the roaster.
- Confirm Link response — Rostoc checks that the incoming data really comes from a Nucleus Link.
- Check roast data — Rostoc confirms live bean temperature and fan readings. Keep the roast running during this step.
- Finish — the test ends on a Test passed screen. Click Done, and stop the roast on the device.
If the Link restarts and reappears on a new USB path, the test picks up the newly detected path without changing the saved Machine settings.
If the test does not pass
Section titled “If the test does not pass”When a step fails, the test marks it in the timeline and explains what went wrong — for example, that data arrived but not from a Nucleus Link, or that no roast data was received in time. Fix the physical setup (cable, port, roast running), then click Try Again to re-run the test.
If it keeps failing, click Send Diagnostics to share the connection details and recent logs with Rostoc support. Nothing is sent until you click the button. After sending, you get a reference code — include it if you contact us.
What Rostoc reads
Section titled “What Rostoc reads”- Bean temperature
- Fan speed
The Link sends data only while a roast is running on the device, which is why the connection test asks you to start a roast.
Automatic Charge and Drop marks
Section titled “Automatic Charge and Drop marks”Nucleus Link reports the start and end of its own roast log, and Rostoc can use those signals directly:
- With Auto Charge on, Rostoc marks Charge from the Link’s roast-log start — no temperature guessing involved.
- Rostoc places the Drop mark from the Link’s roast-end marker whenever a recording is running.
See Roast automation for how to turn this on and what it looks like during a Batch.
Record a sample roast
Section titled “Record a sample roast”Open Roast Studio from a roast plan, or start a roast without a plan when you are evaluating a new coffee. Before recording, confirm:
- the selected machine is the Nucleus Link setup
- the correct green coffee lot is selected
- the sample charge weight is accurate
- the roast is linked to the relevant plan, sample workflow, or evaluation note
Inventory and sample roasting
Section titled “Inventory and sample roasting”Sample roasting consumes green coffee even when each roast is small. Rostoc helps keep that usage visible by connecting the sample roast to green inventory and lots.
Use this workflow when:
- evaluating offer samples before a purchase decision
- comparing several sample roasts from the same lot
- keeping sample roasts tied to cupping notes and production decisions
- tracking sample-room usage separately from production roasting
- roasting small batches
For the broader inventory model, see Green Inventory. For the roast recording workflow, see Roast Studio.
Troubleshooting
Section titled “Troubleshooting”If Rostoc cannot read from Nucleus Link:
- try another USB data cable
- try another USB port
- close Link Studio, Cropster, Artisan, or any other software that may have claimed the device
- restart Rostoc after reconnecting the device
- check operating-system permissions for USB or serial devices
- run a short test roast and compare Rostoc readings with the values shown by the roaster workflow
See Troubleshooting Connections for general USB and serial connection checks.